Graphic Design Portfolios: 4 Printing Tips
Share this article:
 Graduating soon and need a Graphic Design Portfolio? Or looking to give your current portfolio a refresh?
Either way, when it comes to graphic design portfolios, you’ll need to consider your printing options.
And the options for printing are endless.
Should you get a special embellishment or binding? How many pages do you need to include? What sort of paper stock should you choose?
At Rogue Print and Mail, we do Graphic Design Portfolio printing all year round. We’ve compiled this short list of top tips to help you with your portfolio design and print decisions, based on the most frequent questions we get from designers just like you.
1: Have a budget – and stick to it
Before you get too carried away looking at all the amazing print outcomes that are possible, be realistic about what you can afford. With that comes being realistic about what may be possible if you’re on a small budget. Most special binding or embellishment options (perfect bound books, foil stamping, special card stocks etc) attract a higher fee and will generally require a minimum quantity (anywhere from 250 – 1,000 qty) or, the cost for just one could be in the hundreds of dollars. That doesn’t mean you can’t get an awesome custom portfolio – you just need to speak with your printer about what is possible within your budget. Which leads us to:
2: Visit your printer
We’ve got a fantastic showroom of a HUGE range of print options to get you inspired. Pop in anytime business hours or send us an email if you wanted to arrange a time with one of our designers who can discuss options available. If you’re not local, don’t despair – email us and let us know what your budget is and what outcome you’d like, and we’ll send through a few images to get you started (check out our socials for further inspo too).
 3: Don’t get in a bind about binding
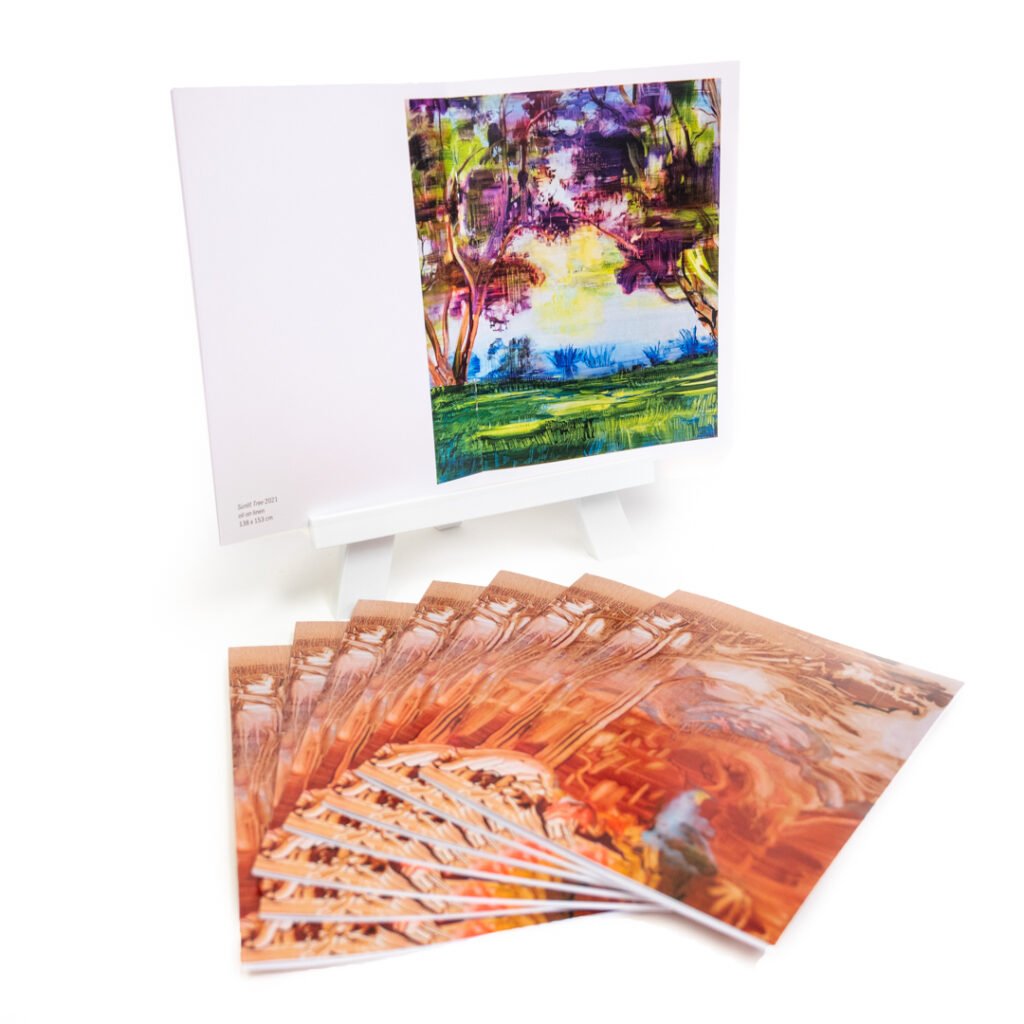
Believe it or not, you don’t need to get your portfolio perfect bound, screw post, wire/comb or other type of binding. There are other, more cost effective ways to get an awesome result – especially if you want more than one copy (see point 1 above). Our best piece of advice? Go with a saddle stitched (stapled spine) booklet.
Modern digital printing technology produces an incredible booklet result with professional finishing capabilities. Our machines produce a “square edged” spine, which means the machine presses and fastens the booklet which creates the appearance of a perfect bound book. These booklets can also be produced in any quantity (from 1 to 10,000 and more), and quickly. The low cost allows you to get multiple copies out to prospective employers too – rather than paying a lot for just one bound document.
Better yet – you can completely customise your booklet. Get thicker covers, get the covers with a gloss or matt laminate, make the book landscape A4 or even trimmed to a square size (210mm x 210mm). Check out just some of our recent booklets here or get in touch to see more or get a quote.
4: Set your document correctly for print
We’ll end this article on what is the most important thing to remember – getting your finished artwork correct. This can be a little daunting if it’s your first print job. If you aren’t sure if your artwork is correct – just call or email your printer. Better yet, ask them for a template before you create your document. As a general guide follow the below or read more about correct artwork specs for print here.
- Set your document to the correct finished size (i.e. A4 portrait is 210mm x 297mm)
- Add 3mm bleed on each edge and extend all elements on the layout to the bleed.
- If your portfolio is a booklet, set up your booklet pages in multiples of 4. Export as single pages in correct page order (NOT ‘facing pages’). The minimum page count of a booklet should be 8 pages.
- Only use images that are 300dpi and in CMYK mode. Achieve this by converting your colours when exporting your PDF too. See our short video below on business card set up as an example:
Our recent client work

Company Branded Toilet Paper

Exhibition Displays in just days – quick event print services

Spectacular Signage Printing for GABS

Rogue Print Fires Up some Movie Magic for Dungeons & Dragons!
Transform Your Space with Foam Board Printing