


How to factor page creep in booklets
Follow our Step by Step tutorial to learn about what page creep is, and how to factor this into your booklet set up.
What is creep in booklets?
In saddle stitched booklet printing, creep is the movement of the pages as they are folded together to form a spine.
Why does page creep occur?
The finished item of a booklet that you receive, is achieved by folding larger flat sheets together (there are 4 'pages' per flat sheet), pressing and stapling the spine, and finally, trimming the fore-edge (right hand side of book) to a common size (i.e., A4).
As the sheets are collated and folded together, the pages start to incrementally move further from the spine and fan out on the fore-edge (this is why the fore-edge gets trimmed). A good way to picture this is to get at least 10-20 pieces of A4 paper, and fold them in half.
This incremental movement (or, 'page creep') generally affects booklets over approx. 40 pages, depending on page thickness/gsm. In simple terms, it means that you will lose space on either side of each page through the above process.
What this means, is that your artwork set up will need to factor in page creep and ensure that no important elements get cut off in the process.
If you view the images on this page, you will see that high page counts (i.e. 132 in the provided example) makes for a very thick spine, around 5mm. This means 5mm will need to be factored in artwork setup, so no text or important elements are too close to the edges, especially in the middle pages where most of the pages will be affected.
In the second example, a 40 page booklet, the creep isn't as pronounced, however you should still be allowing enough clear space on each page if the stock used is a heavy gsm (i.e. over 150gsm).
How do you calculate creep for a booklet?
While many ‘creep calculators’ exist online, we find they are not the most reliable, given that not all artwork will be affected the same way based on the layout, page count and page stock thickness.
Instead, we've put together a guide below that will assist in most booklets over approx. 40 pages.
If your booklet is under this page count, we simply recommend allowing at least 3mm margins on each page. This means no important text or elements should be over that 3mm clear space. You will still need to extend all colours and images to enable full bleed printing.


Guide to factoring page creep in artwork set up
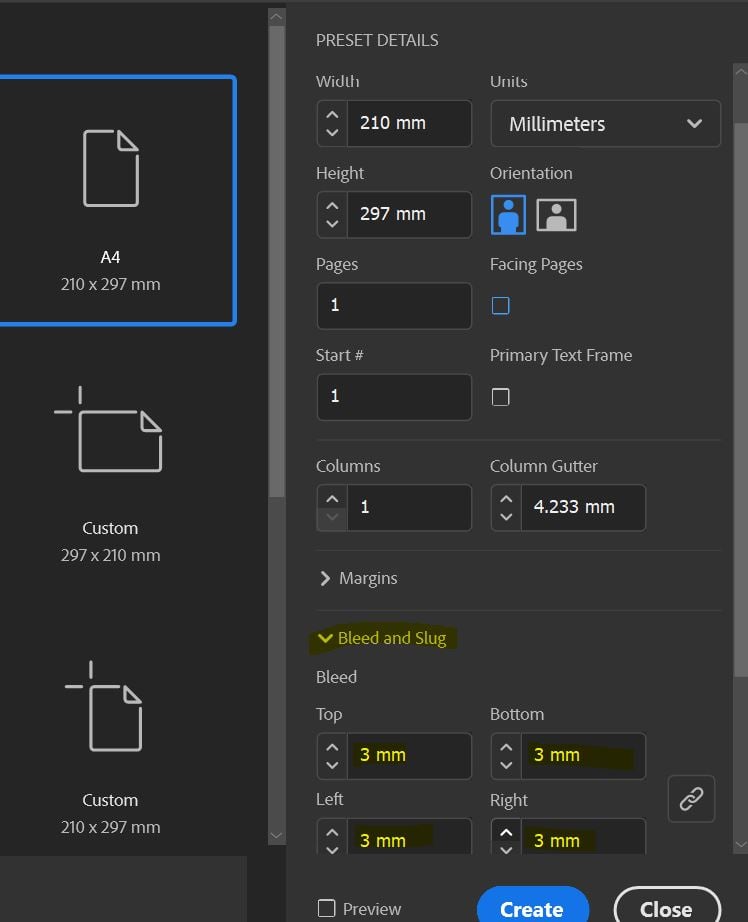
Step 1: Set up your document
If you are using InDesign, please follow the first steps of our tutorial:
Saddle stitch book set up in InDesign
If you are using Canva, please follow the first steps of our tutorial:

Step 2: Set up margins
You can set up margins in InDesign or Canva very easily. The reason for setting up margins, or guides, is to have a set area on each page that important elements - like text and images - are kept within. This ensures they won't be cut off during the booklet process.
If you are using InDesign:
By default, all new documents will show a pink margin line of 12.7mm. This is generally enough space for most documents.
However, it is important to note that you may lose approx. 5mm or more, both sides of each page, during the booklet making process for books over approx. 60 pages. So, you may need higher margins to have more clear space from text areas to edge of page. In this case, go to Layout - Margins and Columns and increase the overall margins (15-20mm).
If you are using Canva:
Ensure you enable show bleed and guides.
Hover over the ruler at the top, left, right, and bottom, and drag down the purple guidelines, one at a time.
Example: If you want 15mm clear space each edge, then drag each line as follows, for a A4 portrait book:
Top: 15mm
Left: 15mm
Right: 195mm
Bottom: 282mm

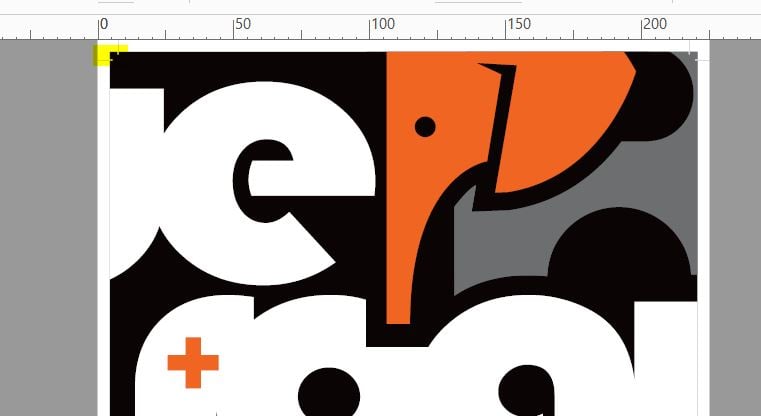
Step 3: Keep artwork elements within margins
Now you have set up your margins / guides, you will need to keep all text and important elements within these set margins/guides. However, all elements that need to bleed to the edge will need to extend to the bleed areas.
See image beside this step for examples.

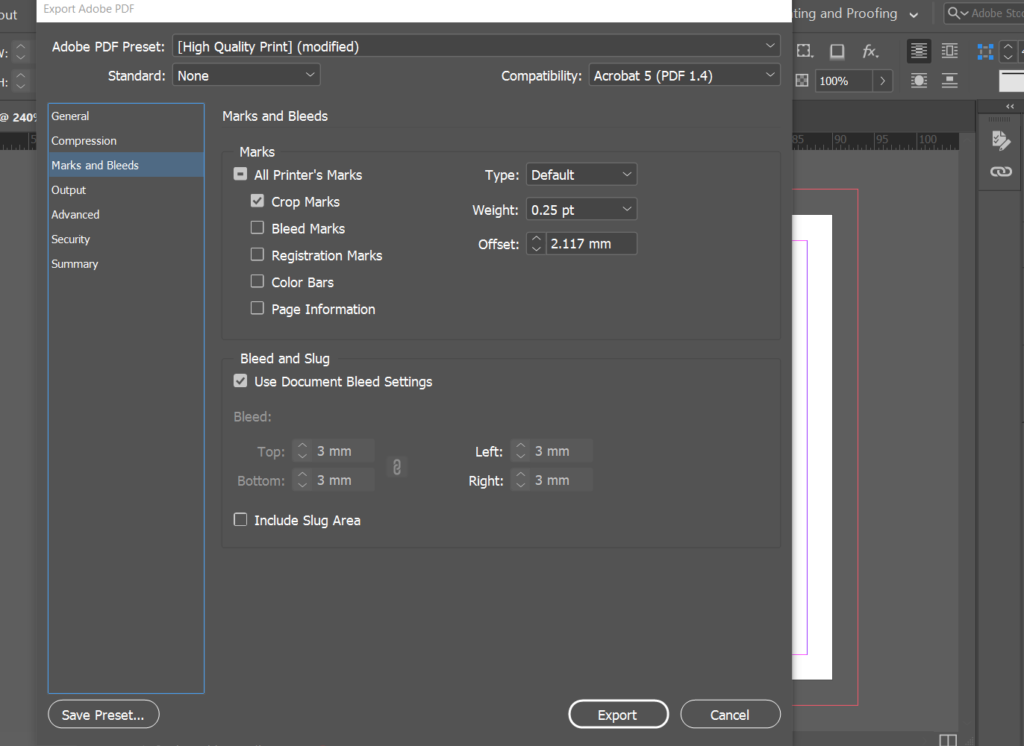
Step 4: Save out for print
Once all your layout work is complete, follow the final steps in the below tutorials to save/export out for print in the format we require:
If you are using InDesign, please follow the final steps of our tutorial:
Saddle stitch book set up in InDesign
If you are using Canva, please follow the final steps of our tutorial:
Learn more about how to set up artwork for print:
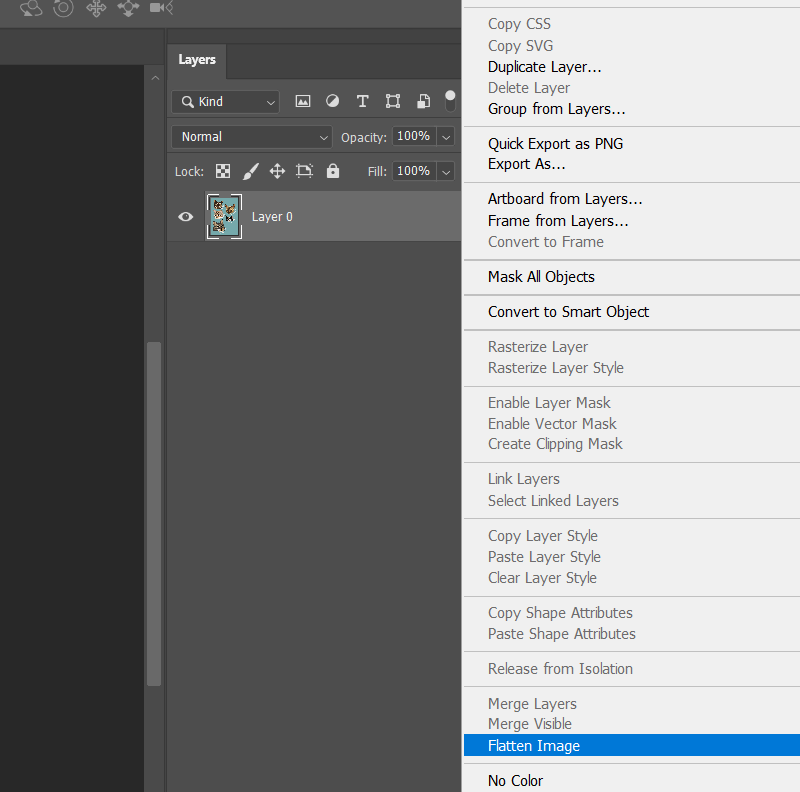
How to Flatten a File for Print
Flattening your artwork is essential due to how design software & production equipment work. Learn how to correctly flatten a file for print.
What are Trim or Crop marks?
What are Trim or Crop marks? Learn what these are and why you need trim/crop marks on your artwork when submitting a print order.
What is bleed in printing?
What is bleed in printing and why do printers ask for bleed in printing files? Let us explain what bleed is in printing and why it’s needed.


