


How to Set up Corflute Signs for Print
Follow our Step by Step tutorial to learn how we require corflute to be set up for print and how to add cut lines for custom shaped signs.
What are the basic print ready requirements?
For corflute printing, we require artwork in the following format:
- A PDF with artwork set to 100% of the actual file size (i.e. if your sign needs to be 1000mmW x 1000mmH - ensure your artwork is 1000mmW x 1000mmH exactly)
- CMYK Colour mode
- All fonts outlined and images embedded
- 3mm bleed and crop/trim marks
- High resolution images - if your images look pixelated on your screen - remember that it will print that way.
- We recommend simply purchasing the highest size stock image. 300dpi is recommended.
What if I need my corflute cut to a shape?
We can custom cut and score corflute to a simple shape, such as a standee, a selfie board, bollard, photobooth prop, stack cube, a frame and much more!
Simply follow our tutorial below on how to set up your cut line.
You will need to have Adobe Illustrator, or InDesign, and some basic graphic design skills to complete this process, so please get in touch for assistance if you do not have these programs.


How to set up custom cut corflute
Skills required:
Programs required:
Artwork Set Up Steps:
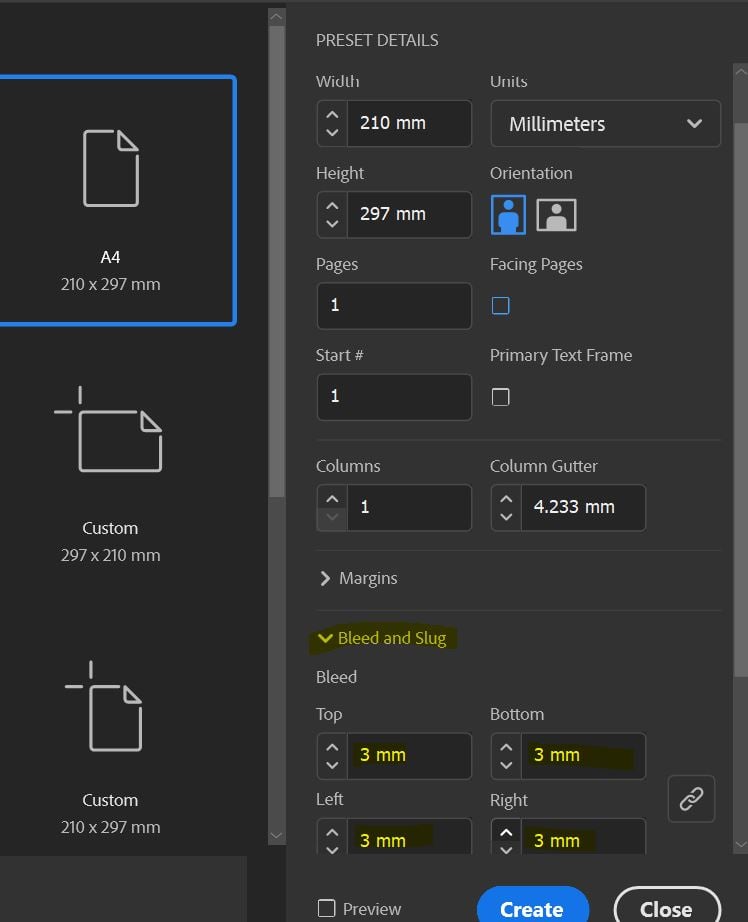
Step 1: Set up your document
- Open Illustrator (recommended) or InDesign
- Select 'print' and type in the size of your sign in mm
- enter 3mm bleed all edges
- CMYK mode
- 300dpi raster effects
- Click 'create'

Step 2: Complete your layout
Complete your design, ensuring you use the following:
- High resolution images - 300DPI
- Logo and other graphical elements in vector or EPS
- Avoid text-based images but if they must be used, ensure the image is 800DPI

Step 3: Create your cut lines
Now you have set up your layout, it's time to create your cut line:
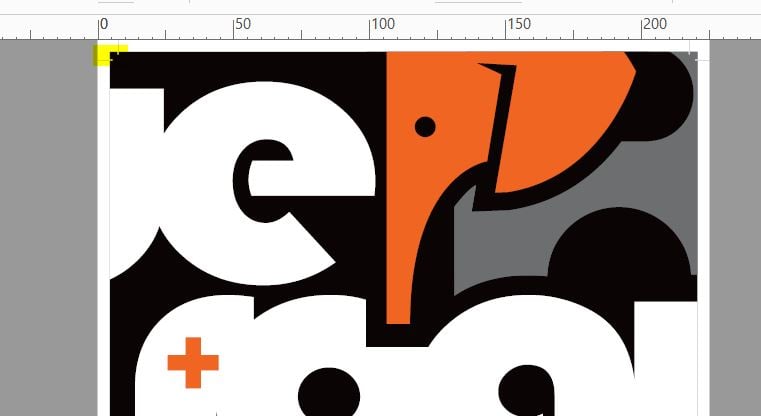
- Use the pen tool or shape building tools to create your desired shape. In the pictured example is a rectangle on a selfie board.
- Avoid complex shapes, and sharp 90 degree + corners. Jagged or sharp corners will have a risk of back cut where the cutter will over cut that section and leave cut lines in the board. There should be as little beziers as possible.
- The end cut line should be a stroke only, and one single/joined stroke that is a smooth, flowing line.
- Remember - your cut line must be 100% of the size it needs to be cut to. For example, the outer cut line in the image here is exactly 1000mm x 1000mm. Select the shape, and check the W and H in the transform panel if you are not sure.
If you are undertaking something like the pictured selfie board, where there is an inside cut, you will need to also have an outside cut, as shown.
If your design also has scoring, you will need to add another stroke line in the areas where the score will be applied, ensuring it does not run over the top of the cut line.

Step 4: Apply spot swatches
Now you have your cut line/s, you will need to apply spot swatch/es, so that our machines will recognise these lines as a cut (or score) and not print the lines:
- Open Window - Swatches
- Select any colour in your swatches to start from (i.e. black, yellow, pink - the actual colour of the swatch isn't important).
- Click the hamburger menu with three lines, and select 'New Swatch'
- Change the Swatch name to 'Thru-cut' and the Color Type to 'Spot'
- Click ok
- Apply your new swatch to your stroke of your cut line only (not fill).
If your artwork has a score:
- Follow steps 1-3 above to create a new swatch.
- Change the Swatch name to 'Score' and the Color Type to 'Spot'
- Click ok
- Apply your new swatch to your stroke of your cut line only (not fill) in the exact areas where scoring is to occur (ensure it does not run over the top of your cut line as above).

Step 5: Save for print, check your file
- Save as a Press Quality PDF (ensuring all steps above are followed - i.e. the artwork is CMYK, file / cut lines are the correct size, etc)
- View the PDF in Acrobat Pro - Print production - output preview - to check if your cut lines are correctly set up, they should look like the image shown where spot colours are sitting under the 'spot plates' area. Ensure the name 'Thru-cut can be seen as shown.

Learn more about how to set up artwork for print:
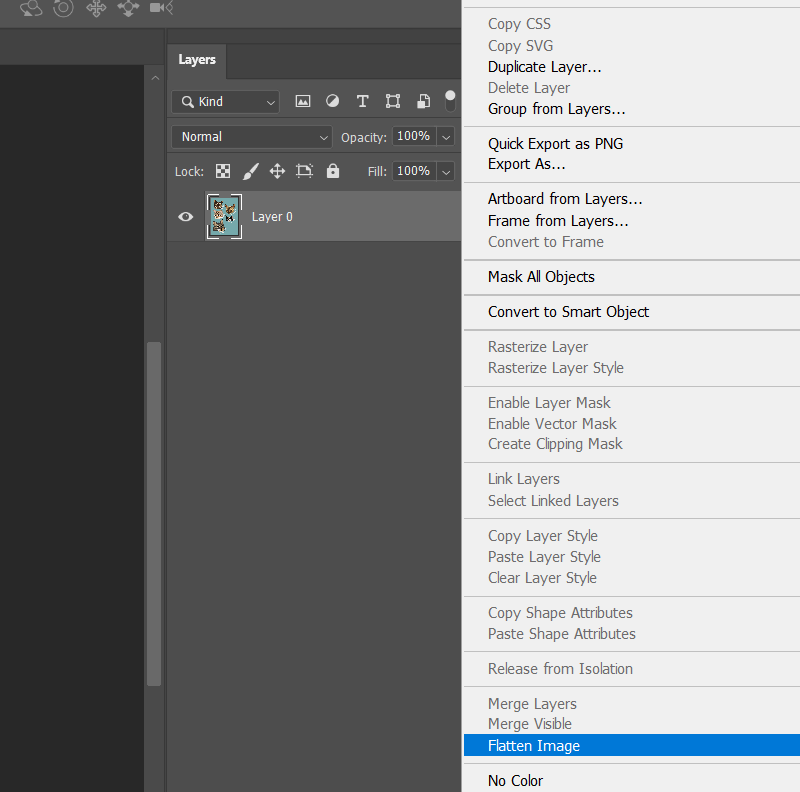
How to Flatten a File for Print
Flattening your artwork is essential due to how design software & production equipment work. Learn how to correctly flatten a file for print.
What are Trim or Crop marks?
What are Trim or Crop marks? Learn what these are and why you need trim/crop marks on your artwork when submitting a print order.
What is bleed in printing?
What is bleed in printing and why do printers ask for bleed in printing files? Let us explain what bleed is in printing and why it’s needed.


