

How to create a print ready PDF with InDesign
Follow our Step by Step tutorial to set up a document in Adobe InDesign for print.
Some general tips before you get started:
- Keep text and design elements you don’t want cut off within clear space margins. This is to ensure none of your essential artwork is cut when taking into account the 1-2mm variance with the guillotine when cutting your order down to size.
- We recommend avoiding borders around the edge of artwork as ensuring absolute evenness of these borders in the finishing process is extremely difficult.
- For further tips, tutorials and essential information, visit our artwork set up page: https://rogueprintandmail.com.au/artwork-set-up-for-print/
Creating a print ready PDF with InDesign
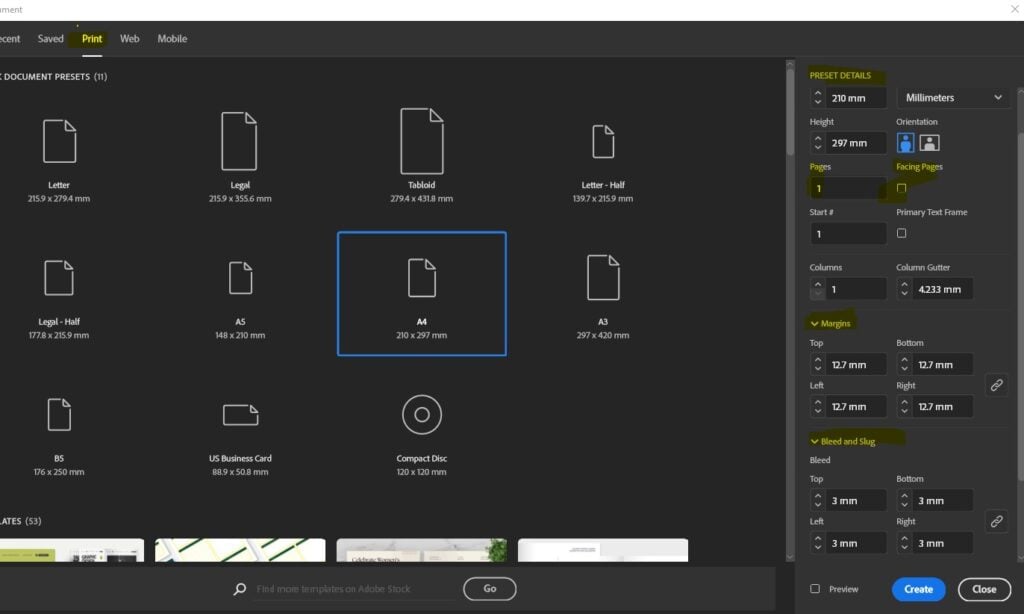
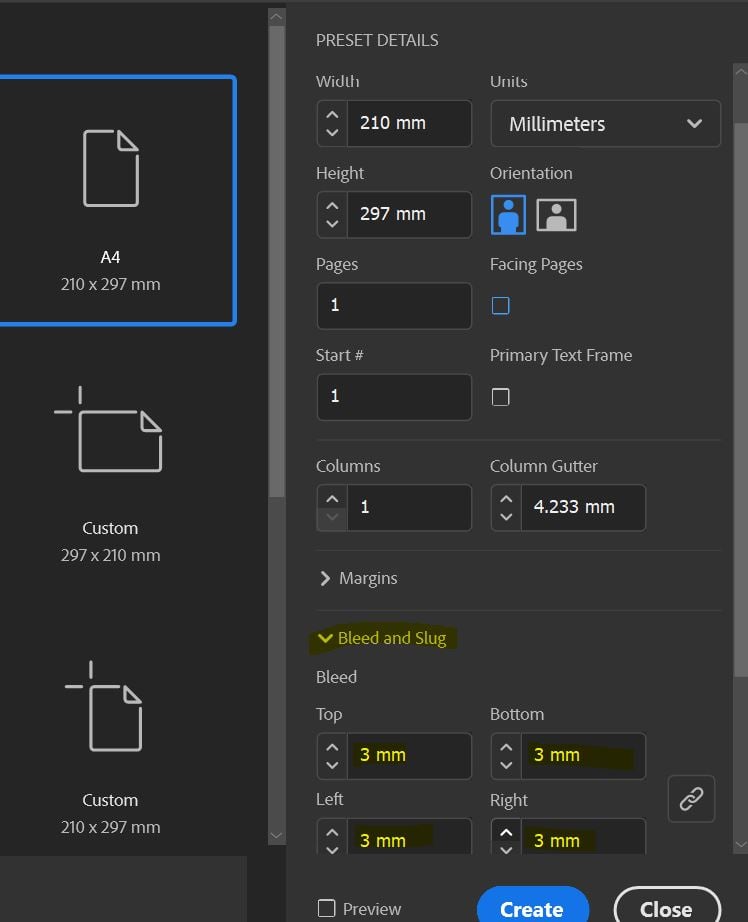
Step 1: Set up your document
- Open Indesign
- Click 'Create New' - choose 'Print' from the tabs.
- In the Preset details, enter the size of your document. For example, for an A4 portrait document, enter a width of 210mm and a height of 297mm.
- Untick 'Facing Pages' if your document is not a saddle stitched book.
- Enter pages (i a booklet, this must be in multiples of 4: 8,12,16,20 etc.)
- Margins: default 12.7mm all edges (see next step for further info).
- Bleed: enter 3mm and link to all sides/edges.
- Click 'Create'.
Step 2: Set up margins
- By default, all new documents will show a pink margin line of 12.7mm. This is generally enough clear space (from the edge) for most documents. This space is to ensure none of your essential artwork is cut when taking into account the 1-2mm variance with the guillotine when cutting your order down to size.
- Keep text and design elements you don’t want cut off within this margin. The absolute mnimum clear space from each edge is 3mm.
- However, it is important to note that you may lose approx. 5mm or more, both sides of each page, if your document is a booklet over approx. 60 pages. So, you may need higher margins to have more clear space from text areas to edge of page. In this case, go to Layout - Margins and Columns and increase the overall margins (15-20mm).
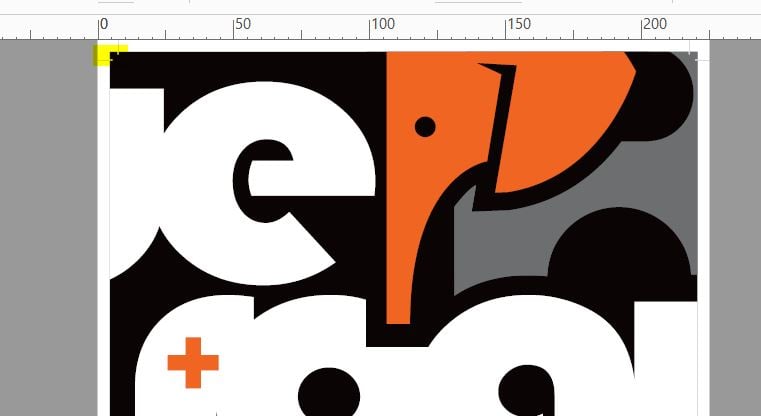
Step 3: Check margins and bleed
- Now you have set up your margins / guides, you will need to keep all text and important elements within these set margins/guides.
- All elements that need to bleed to the edge (colours, images) will need to extend to the bleed area (red line).
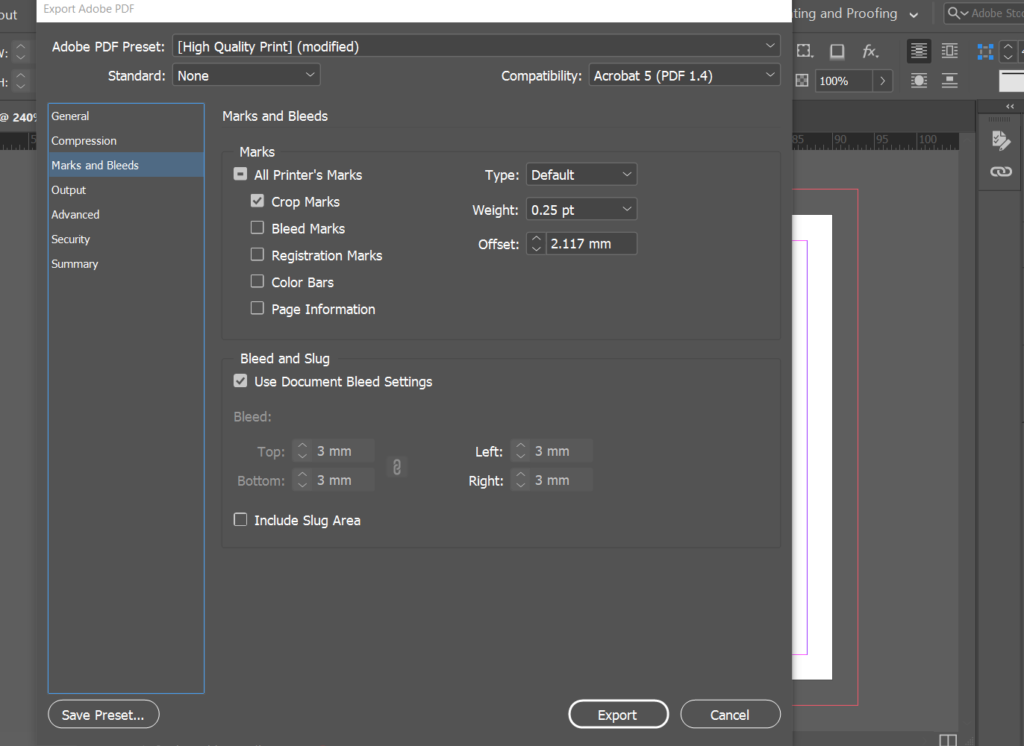
Step 4: Export as a Press Quality PDF
1. Click File - Export - Save AS Type: Adobe PDF (Print)
2. In the General tab select the following:
• Export as Pages -do NOT click Spreads!
• Select All Pages (assuming you are exporting all pages in the document)
3. In the Compression tab select the following:
• Colour images: 300PPI, Automatic (JPEG), Image Quality: Maximum.
• Repeat in the Greyscale and monochrome options if your artwork utilises these
• click 'Compress text and line art'
4. In the Marks and Bleeds tab:
• in Marks just select 'Crop Marks'
• in Bleeds tick 'Use document settings' which should show 3mm on all four edges
5. In the Output tab:
• Convert to destination, select "Document CMYK (U.S. Web Coated SWOP V2)", and DON'T include profiles.
• Click on Ink Manager and check if there are any spot (Pantone) colours. If they are, just click 'All spots to process'
• You can now click the Export button to export your file to PDF.
Note: Converting Spot Colours to CMYK can cause a variance in colour – it is recommended that you request a hard copy prior to approval to ensure you are happy with any colour change.
Learn more about how to set up artwork for print:
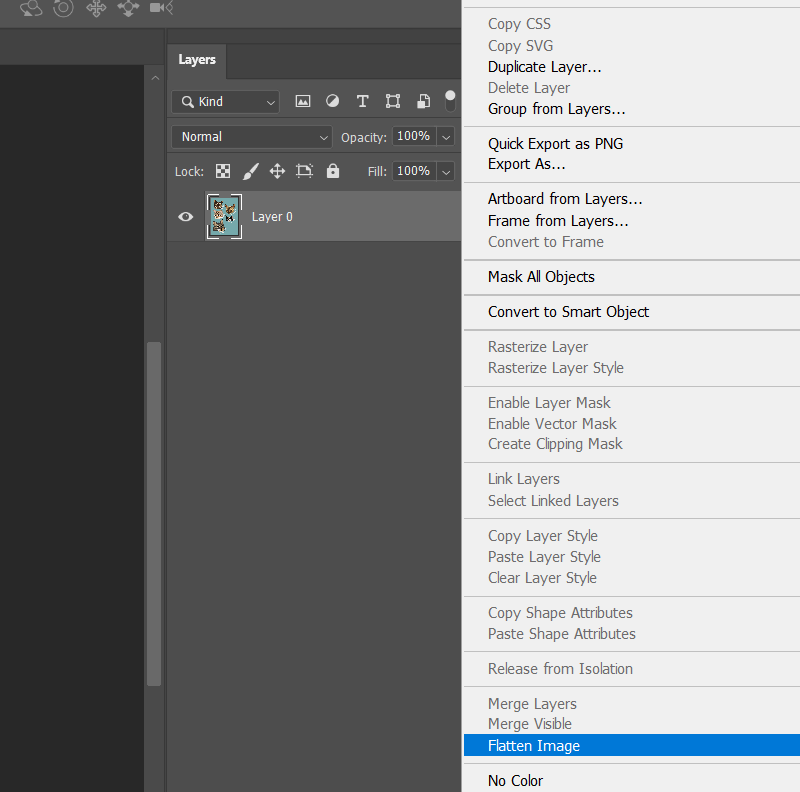
How to Flatten a File for Print
Flattening your artwork is essential due to how design software & production equipment work. Learn how to correctly flatten a file for print.
What are Trim or Crop marks?
What are Trim or Crop marks? Learn what these are and why you need trim/crop marks on your artwork when submitting a print order.
What is bleed in printing?
What is bleed in printing and why do printers ask for bleed in printing files? Let us explain what bleed is in printing and why it’s needed.


