

How to set up a PUR Bound book for print
Follow our Step by Step tutorial to learn How to set up a PUR Bound book for print
PUR Bound books are outstanding solution for volume run books over approx. 80+ printed pages, with a durable glued spine and option to have a design / text on the spine, especially for larger page counts.
PUR bound books use a flexible adhesive called polyurethane resin (PUR) that bind together trimmed pages with an outer cover spread. Unlike traditional perfect binding EVA glue, PUR adhesive is a far stronger bond. PUR Bound is the most common method we use to produce perfect bound (glued spine) books, however this tutorial is applicable for all forms of perfect binding including burst binding.
When it comes to the set up of these books, there is special consideration required for the covers and the first and last pages. This is due to how the book is produced and the need for Ink free, or glue trap margins (white/no colour areas), to ensure the glue binds to the stock on the spine and cover hinges. The spine width will need to be calculated based on stock and page count, and the covers outside and inside are to be supplied as a spread with ink free areas, that we will detail below.
In summary, this tutorial will cover:
- Set up for the back and front of your covers
- Set up for the pages that need to have an ink free margin to adhere to the spine (left side of first page, right side of last page)
- Set up for the rest of your internal pages
With those considerations in mind - let's get started:
Time Needed: 30 minutes
Things Needed?
Required tools:
Set up and layout your file:
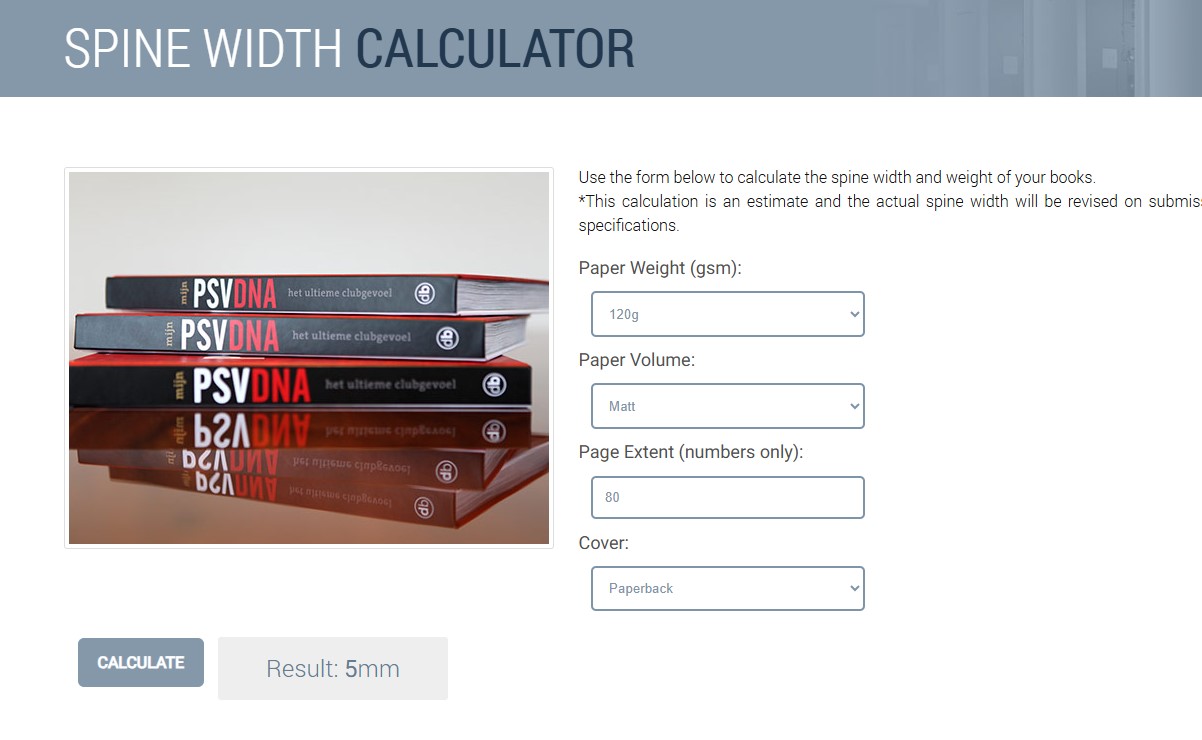
Step 1: Calculate your spine width
- Before any set up occurs, first calculate your spine width. This is essential as the final PDF file we require will be a 1x spread of the back cover + spine + front cover - for both inside and outside the covers.
- We can advise this width for you, or, you can use this calculator.
- To use the calculator you will need to know your total page count, gsm of stock and stock type.
NOTE: In this tutorial, our book will be an A4 portrait finished size, that has a spine width of 5mm, and we will be using Adobe InDesign. (InDesign or Illustrator recommended however this can also be set up in Canva).
All following steps are based on this set up for reference.
Step 2: Set up your covers
- Open design software and start a new file just for the covers. In later steps we will set up internals.
- In the preset details: in the size, you will need to enter the full spread (single page to full size of back cover, spine and front cover). In this example, the size of an A4 portrait book with a 5mm spine will be: 297mm H x 425mm W
- Total of 2 pages.
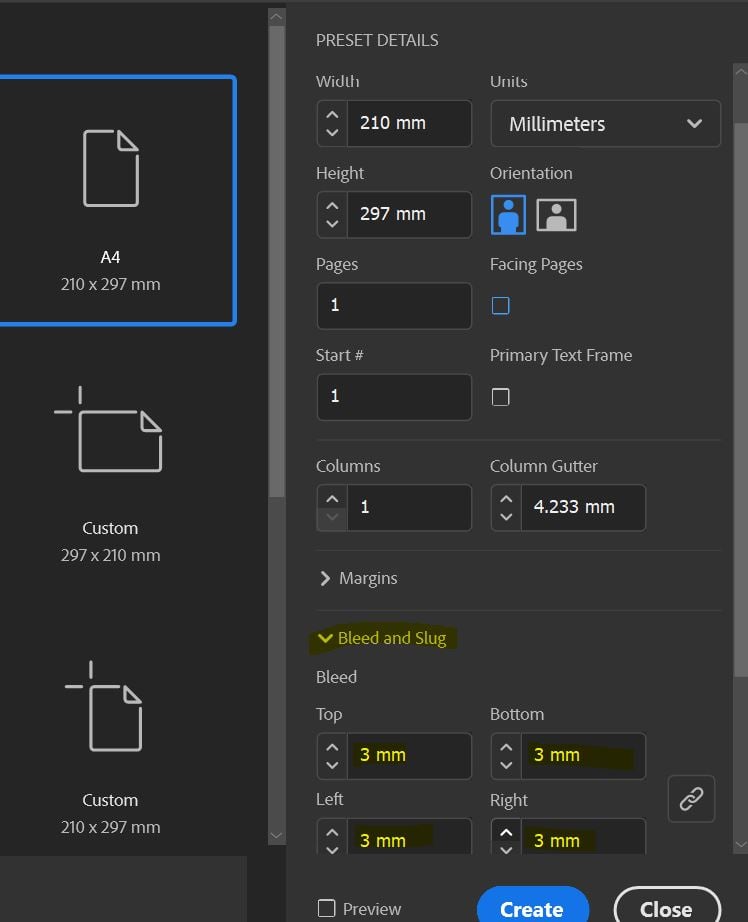
- Untick facing pages and enter 3mm bleed all corners.
- Click 'Create'.
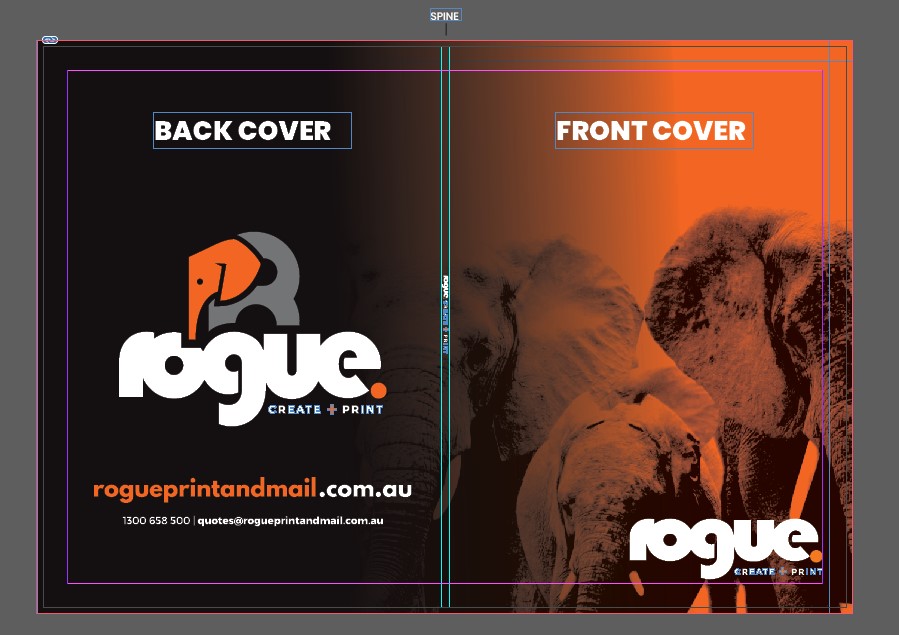
- Set up your covers with spine and ink free / glue trap areas as follows:
Page 1 will be for your outer covers. On this page, set up a guides so you can add text if you wish for it to appear on the spine. Ensure nothing important goes beyond the spine width. And factor this spine width in your overall deign.
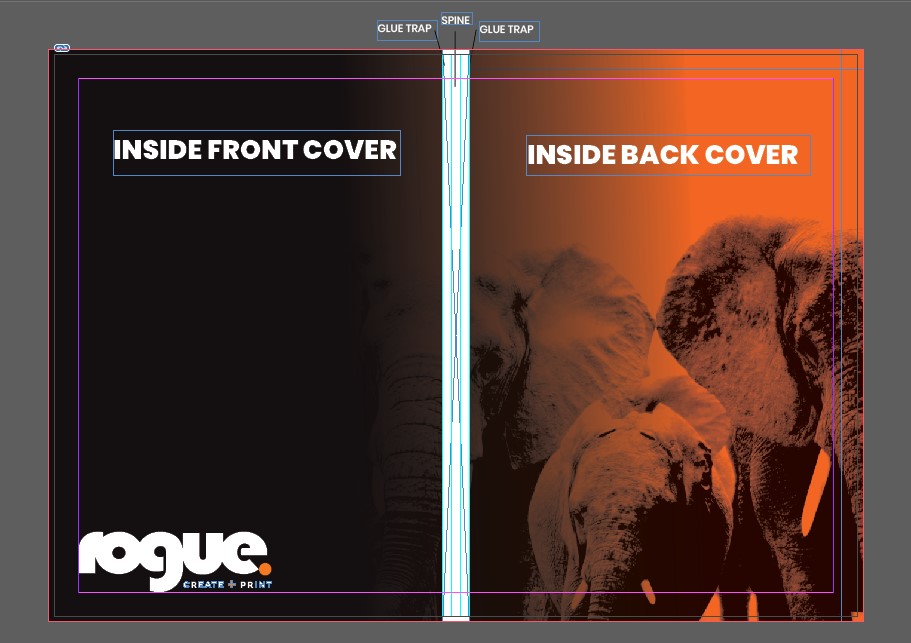
Page 2 will be for your inside covers. On this page, set up guides for the various ink free zones that are required:
- Ink free spine area: 5mm in the middle - this is your spine area. There must be no colour or elements on this area.
- Glue trap: an additional 4mm either side of the spine for the glue trap. There must be no colour or elements on this area.
- Total ink free area: This leaves a 14mm ink free area in the middle of the spread. There must be no colour or elements on this area.
7. When the design is correctly set up, export for print:
- Ensure all colours/graphics bleed to the edge (the red outer line), and no text goes beyond the margins
- Ensure all placed images/vectors are either linked or embedded
- Click File - Export - Save AS Type: Adobe PDF (Print)
- In the General tab select the following:
- Export as Pages -do NOT click Spreads!
- Select All Pages (assuming you are exporting all pages in the document)
- In the Compression tab select the following:
- Colour images: 300PPI, Automatic (JPEG), Image Quality: Maximum.
- Repeat in the Greyscale and monochrome options if your artwork utilises these
- click 'Compress text and line art'
- In the Marks and Bleeds tab:
- in Marks just select 'Crop Marks'
- in Bleeds tick 'Use document settings' which should show 3mm on all four edges
- In the Output tab:
- Convert to destination, select "Document CMYK (U.S. Web Coated SWOP V2)", and DON'T include profiles.
- Click on Ink Manager and check if there are any spot (Pantone) colours.
- If they are, just click 'All spots to process'
- You can now click the Export button to export your file to PDF.
Step 3: Set your internal pages
- Open design software and start a new file just for the internals.
- In the preset details: in the size, this will be the final trim size - so for A4, it is 210mm W x 297mm H
- Untick facing pages.
- Enter 3mm bleed all corners.
- Enter your total number of internal pages (minus 4, as your covers are already set up).
- Click 'Create'.
- Due to adhesion requirements to the spine, the first and last internal pages will require ink free areas as follows:
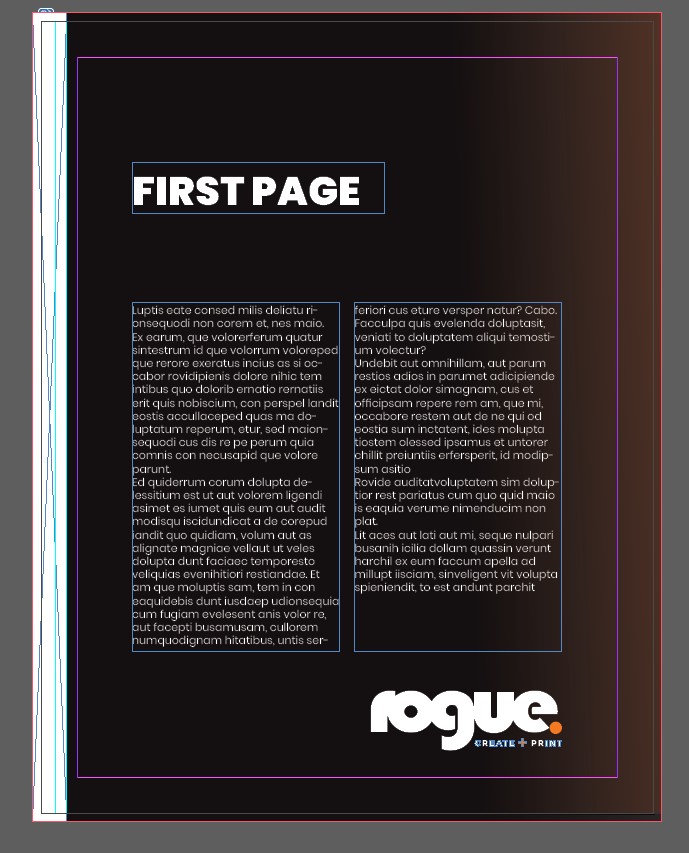
6.1 First internal page:
- On the first internal page, you will need an ink free area due to adhesion requirements.
- This will be a 4mm strip / white area in addition to the spine, and be on the left hand side.
- So, for our book that has a 5mm spine, the total area will be 9mm from the left hand edge - this needs to go to the bleed edge as well:
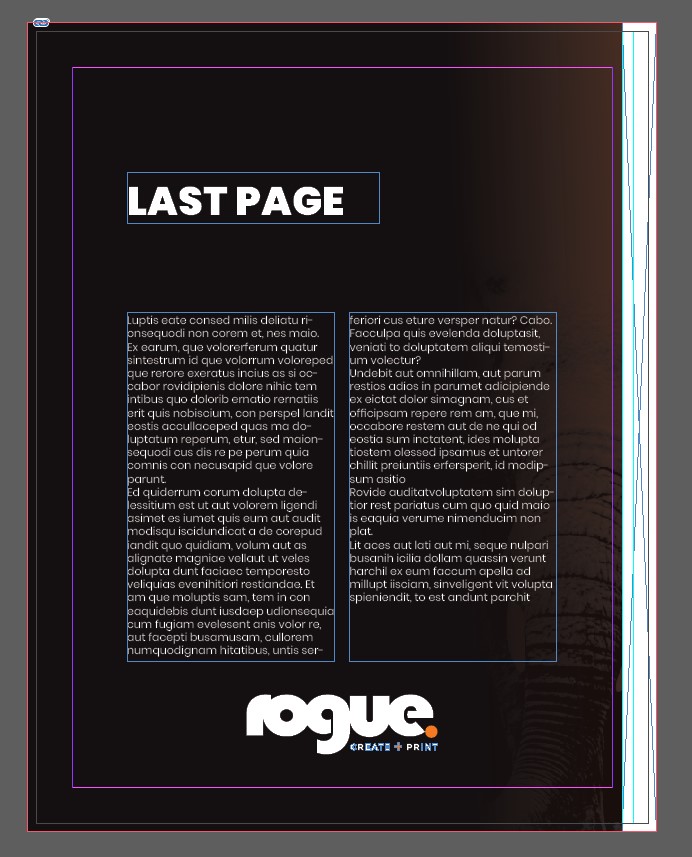
6.2 Final internal page:
- On the final internal page, you will need an ink free area due to adhesion requirements.
- This will be a 4mm strip / white area in addition to the spine, and be on the right hand side.
- So, for our book that has a 5mm spine, the total area will be 9mm from the right hand side - this needs to go to the bleed edge as well:
7. All other pages:
Continue to lay out the rest of your pages in this document as normal, noting:
- Ideally and if possible, set your internal pages as individual pages not spreads (untick 'facing pages' in InDesign at the start of your document set up - as per the instructions at the beginning of step 3). However, this is not essential.
- Avoid having anything essential like images or diagrams spread over 2 pages, as PUR books don't open totally flat.
- Ensure you keep important elements within clear space margins (use the default ones InDesign provides, or set up to at least 10mm all edges).
8. When the design is correctly set up, export for print:
- Ensure all colours/graphics bleed to the edge (the red outer line), and no text goes beyond the margins
- Ensure all placed images/vectors are either linked or embedded
- Click File - Export - Save AS Type: Adobe PDF (Print)
- In the General tab select the following:
- Export as Pages -do NOT click Spreads!
- Select All Pages (assuming you are exporting all pages in the document)
- In the Compression tab select the following:
- Colour images: 300PPI, Automatic (JPEG), Image Quality: Maximum.
- Repeat in the Greyscale and monochrome options if your artwork utilises these
- click 'Compress text and line art'
- In the Marks and Bleeds tab:
- in Marks just select 'Crop Marks'
- in Bleeds tick 'Use document settings' which should show 3mm on all four edges
- In the Output tab:
- Convert to destination, select "Document CMYK (U.S. Web Coated SWOP V2)", and DON'T include profiles.
- Click on Ink Manager and check if there are any spot (Pantone) colours.
- If they are, just click 'All spots to process'
- You can now click the Export button to export your file to PDF.
Step 4: Double check your artwork set up
Before you export, double check your design:
- Ensure all colours/graphics bleed to the edge (beyond the trim marks), and no text goes beyond the margins
- Ensure all placed images/vectors are either linked or embedded
- No pixelated images (under 300dpi) are used.
- Spine width is correct.
- Ink free/ glue trap areas are correct and do not contain any colour/elements.
Step 5: Check your file and send to us for print!
- Open up the PDFs you have exported, to make sure everything looks as you want it to.
- Ensure that you can see Crop Marks and that the art bleeds beyond that (note: bleed marks aren't required)
- Ensure both covers front and back, first and last internal pages, and all other internal pages, are set up per the above steps.
- Fix any errors and re-export
- If you are happy with your digital proof, send through to us for print. To do so, you can email us the file quotes@rogueprintandmail.com.au or upload to our wetransfer site: https://rogueprintandmail.wetransfer.com/
Learn more about how to set up artwork for print:
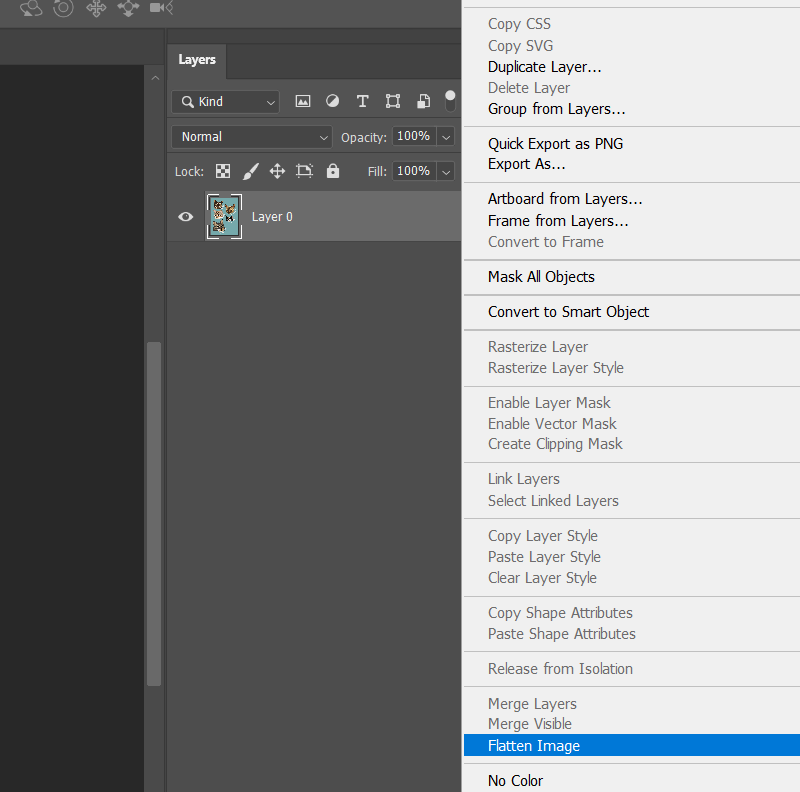
How to Flatten a File for Print
Flattening your artwork is essential due to how design software & production equipment work. Learn how to correctly flatten a file for print.
What are Trim or Crop marks?
What are Trim or Crop marks? Learn what these are and why you need trim/crop marks on your artwork when submitting a print order.
What is bleed in printing?
What is bleed in printing and why do printers ask for bleed in printing files? Let us explain what bleed is in printing and why it’s needed.


